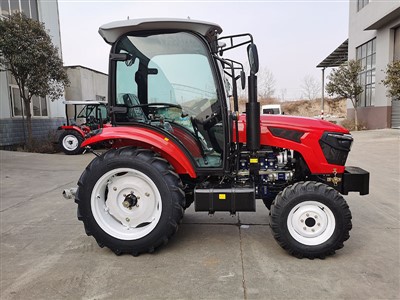


Hey there, fellow farmers! As a supplier of Farm Ridgers, I've seen my fair share of issues that can crop up with these essential pieces of equipment. Today, I'm gonna walk you through some common problems you might encounter with a Farm Ridger and how to troubleshoot them.
1. Ridging Depth Inconsistency
One of the most common problems is when the Farm Ridger doesn't dig to a consistent depth. This can lead to uneven ridges, which isn't great for planting.
Possible Causes
- Uneven Ground: If the ground you're working on isn't level, it can cause the ridger to dig at different depths.
- Blade Wear: Over time, the blades on the ridger can wear down, which affects their ability to dig evenly.
- Incorrect Adjustment: Maybe the ridger hasn't been adjusted properly for the soil type or the desired ridge depth.
Troubleshooting Steps
- Check the Ground: Before you start ridging, take a look at the field. If there are any large bumps or dips, try to level them out using a Tractor Grader Blade. This will give you a more even surface to work on.
- Inspect the Blades: Look at the blades for signs of wear. If they're dull or damaged, it's time to replace them. You can usually find replacement blades at your local farm equipment store.
- Adjust the Ridger: Refer to the user manual to make sure you've set the ridger to the correct depth for your soil type. You might need to make some trial runs and adjust the settings as you go.
2. Clogging Issues
Another problem you might face is the ridger getting clogged with soil, roots, or other debris. This can slow down the machine and even cause it to stop working altogether.
Possible Causes
- Wet Soil: If the soil is too wet, it can stick to the blades and other parts of the ridger, causing clogs.
- Long Grass or Roots: Thick grass or long roots in the field can get caught in the ridger and block the blades.
- Inadequate Cleaning: If you don't clean the ridger regularly, dirt and debris can build up over time and cause clogs.
Troubleshooting Steps
- Wait for the Soil to Dry: If the soil is wet, it's best to wait a few days for it to dry out before using the ridger. This will reduce the chances of clogging.
- Clear the Field: Use a Farm Mower to cut down any long grass or weeds in the field before ridging. This will prevent them from getting caught in the ridger.
- Clean the Ridger Regularly: After each use, make sure to clean the ridger thoroughly. Use a brush or a pressure washer to remove any dirt, debris, or plant material from the blades and other parts of the machine.
3. Poor Ridge Shape
Sometimes, the ridges created by the ridger might not have the right shape. They could be too wide, too narrow, or have uneven sides.
Possible Causes
- Incorrect Blade Angle: The angle of the blades can affect the shape of the ridges. If the blades are set at the wrong angle, the ridges won't come out right.
- Soil Compaction: If the soil is too compacted, it can be difficult for the ridger to create well - shaped ridges.
- Speed of Operation: Going too fast or too slow while ridging can also affect the shape of the ridges.
Troubleshooting Steps
- Adjust the Blade Angle: Check the user manual to find the correct blade angle for the type of ridges you want to create. Make the necessary adjustments and test the ridger on a small area to see if the ridge shape improves.
- Loosen the Soil: Use a tiller or a plow to loosen the soil before ridging. This will make it easier for the ridger to create well - defined ridges.
- Find the Right Speed: Experiment with different speeds to find the one that works best for your soil type and the desired ridge shape. A slower speed might be better for more precise ridging.
4. Mechanical Failures
Mechanical failures can be a real headache, but they're not uncommon with Farm Ridgers. This could include problems with the engine, belts, or gears.


Possible Causes
- Lack of Maintenance: Not following the recommended maintenance schedule can lead to mechanical problems. This includes things like not changing the oil, not tightening loose bolts, or not lubricating moving parts.
- Wear and Tear: Over time, the parts of the ridger will naturally wear out. If they're not replaced in a timely manner, it can lead to more serious problems.
- Overloading: Using the ridger on terrain that's too tough or trying to ridge too much at once can put too much strain on the machine and cause mechanical failures.
Troubleshooting Steps
- Follow the Maintenance Schedule: Make sure you're following the maintenance schedule in the user manual. This includes regular oil changes, checking and tightening bolts, and lubricating moving parts.
- Inspect and Replace Worn Parts: Regularly inspect the ridger for signs of wear and tear. If you notice any parts that are worn out, replace them as soon as possible.
- Don't Overload the Machine: Be realistic about what the ridger can handle. If you're working on tough terrain, consider using a more powerful tractor or breaking the job into smaller sections.
5. Difficulty in Turning
If you're having trouble turning the Farm Ridger, it can make it difficult to maneuver in the field.
Possible Causes
- Incorrect Hitch Setup: If the ridger isn't hitched to the tractor correctly, it can cause problems with turning.
- Uneven Weight Distribution: If the weight on the ridger isn't evenly distributed, it can make it harder to turn.
- Tire Pressure: Incorrect tire pressure can also affect the turning ability of the ridger.
Troubleshooting Steps
- Check the Hitch Setup: Make sure the ridger is hitched to the tractor according to the manufacturer's instructions. Adjust the hitch if necessary to ensure a proper connection.
- Balance the Weight: Check to see if the weight on the ridger is evenly distributed. You might need to move some equipment or adjust the position of the blades to achieve better balance.
- Check the Tire Pressure: Use a tire pressure gauge to check the pressure in the ridger's tires. Make sure it's at the recommended level for optimal performance.
Conclusion
Well, there you have it, folks! These are some of the most common problems you might encounter with a Farm Ridger and how to troubleshoot them. By following these steps, you can keep your ridger in top shape and ensure that it's working efficiently.
If you're in the market for a new Farm Ridger or need replacement parts for your existing one, don't hesitate to reach out. We're here to help you find the best solutions for your farming needs. Whether you're dealing with snow removal and need a Tractor Snow Blower or just want to keep your fields in great condition, we've got you covered.
Let's get your farm up and running smoothly. Contact us today to start the procurement process and let's talk about how we can make your farming operations more successful.
References
- Farm equipment user manuals
- Personal experience as a Farm Ridger supplier